Size
Color

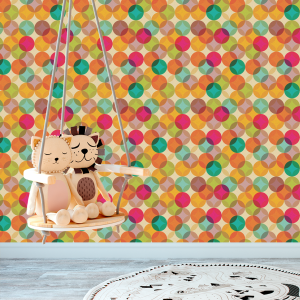

Wallpaper for Cabinets: The Best for a Perfect Finish
Covering a cabinet with wallpaper is an express renovation that transforms any room for little money.
At Sweet Papaya, we help you choose the material, calculate the square footage without wasting space, and prepare difficult surfaces (hello, melamine) so you can hang it like a pro with our installation guide without going crazy with bubbles.
Wallpaper or Adhesive Vinyl for Cabinets?
Wallpaper (traditional/non-woven, with glue)
- Pros: “textile” feel, better concealment of micro-imperfections, breathability of the substrate (non-woven). More “decorative” and matte finishes.
- Cons: Requires glue and a little more skill on edges and borders. Not suitable for surfaces exposed to steam/direct water (highly exposed kitchen doors), except for washable models.
Adhesive Vinyl (self-adhesive)
- Pros: Quick installation, washable, wide variety of wood/stone effects. Ideal for areas with frequent cleaning.
- Cons: It highlights support flaws more. On large doors, the joint can easily become visible if you don't align it properly.
Quick rule
- Bedroom/Hallway: Non-woven wallpaper or a heavy-weight cellulose backing.
- Kitchen/Bathroom (outside direct splashes): Washable vinyl or washable vinyl paper.
- How to measure a wardrobe and calculate the square footage
- You'll need: a tape measure, a notebook, and photos of the front.
- Count the doors and note the height x width of each.
- Add 5–8 cm of top and bottom margins per door for safe cuts.
If the design has a repeating pattern, add the proportion (repeat of the pattern) for each vertical joint.
Quick calculation
- Wardrobe with 2 sliding doors: 200 x 80 cm each.
- Usable height for each strip: 200 + 8 cm margins = 208 cm.
- Usable width per strip (if the wallpaper is 53 cm): 80 cm → you need 2 strips per door (106 cm covered), with extra for overlap and adjustment.
- Total: 4 strips of 208 cm (and I always order +1 safety strip).
At Sweet Papaya, you can buy by the meter or by the strip, so you can order the exact widths. The advantage of working with our custom-made store is that if you're missing a piece, we'll repeat the same strip and the same batch without having to buy a 10 m roll.
Wallpaper Installation for Closet Doors
Tool checklist: Sharp utility knife + spare blades, felt squeegee, microfiber cloth, pressure roller, level (preferably laser), tray/glue (if applicable), and damp cloth.
Hinged doors (wallpaper with glue):
- Mark a vertical line with the level 1–2 cm from the inside edge to start straight.
- Glue the wall/support or backing (depending on the manufacturer) and lay the strip on top, leaving 2–3 cm of excess.
- Use the felt spatula to lower the centre of the strip outwards.
- Cut the top and bottom with a utility knife and ruler.
- Repeat, taking care to maintain the pattern.
Sliding doors (self-adhesive or paper):
- Lay the strip on the wall and bevel it, leaning on the edge, so the edge is clean.
- If it's self-adhesive, peel off 30–40 cm of liner, align it at the top, stick it down, and advance, pulling the liner back little by little.
- Use a roller on the edges and contours to ensure adhesion.
Beyond these recommendations, Sweet Papaya sends you a step-by-step installation guide. You'll see that all you have to do is follow it, and the difference will be a photo-perfect result.
Frequently asked questions about wallpaper for closets
Can you put wallpaper over melamine or lacquer?
Yes. Clean and degrease, sand very lightly (240–320 grit) to dull the shine, and use an anchoring primer if the wallpaper is glued. If it's self-adhesive, a thorough cleaning and perfect drying will suffice.
Are the joints between strips noticeable?
With good pattern alignment and double cutting (overlap 1–2 cm, cut both layers, and remove the excess) they're almost invisible. Centre the pattern on each door to avoid a "shifted effect."
How do I maintain and clean the wallpaper on the cabinets?
Damp cloth with neutral soap; dry afterward. Avoid scouring pads and abrasive products. Keep away from direct steam or heat sources. In kitchens, prioritize washable vinyl or adhesive vinyl.
What should I do if I damage a strip or am I missing material?
Don't disassemble everything. If you're purchased by the strip or custom-made, order the same strip (same batch) and replace it. It's cheaper than buying a whole roll and maintains the same colour/pattern.
How do I avoid bubbles and wrinkles?
Install from top to bottom, pushing the air out from the centre toward the edges with a spatula. Don't pull it taut all at once: work 30–40 cm at a time (for self-adhesive products, peeling off the liner little by little). If a bubble appears, puncture it with a fine needle and press.